QuickBooks is an outstanding software that caters to the accounting needs of a business. Being one of the best applications for managing finances it has gained a significant reputation in the market. Although machines and software tend to face certain technical glitches, QuickBooks error 1117 is one such very common issue that generally arises when there is an attempt to store the data back up. Let’s check out a few manual procedures to learn about the rectification of this glitch.
What is QuickBooks error 1117
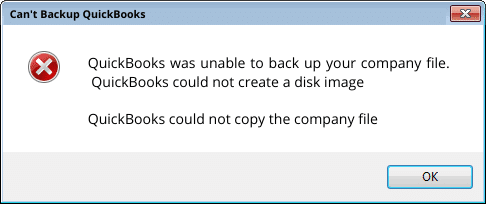
QuickBooks error 1117 is an issue that can be an issue in the QuickBooks software especially when a customer tries to create and store the data backup. If your system is facing the issues and these are the few symptoms using which you can detect the correct stature the software:
- Sudden freezing of windows
- Irregular shut down
- Irresponsive windows
Cause of Error 1117
Check out the list of the factors that can trigger error 1117 in QuickBooks.
- The error might occur if the folder if the backup file that has been stored is not conveniently accessible.
- If the company file has a longer name than the criteria. As per the criteria, there should be 65 characters, along with an extension.
- The error might trigger if the company data file is Corrupted.
- If the QuickBooks support file or Network data file is damaged.
- if the user is working on an older version of QB Desktop or Windows.
4 Steps To Fix QuickBooks Error 1117
Method 1 – Make sure that Intuit Data Protect is not Blocked by the Firewall
- Begin with clicking on the Windows icon
- Now go to the Start menu.
- Further, go to the search panel and then type Firewall followed by selecting the option ‘new window’.
- From here you need to tap on the “Allow app through Firewall” option and then click on “Allow another app.”
- Further, you must hit the Browse button to reach to – Program Files(x86)\Common Files\Intuit\Data Protect.
- Further, you must QBIDPservice.exe and click on Open.
- Now follow the same procedure for:
– IBUenghost.exe
– IntuitDataProtect.exe
- Finally, reach to the Network Types section, Nd then checkmark the Private box, and click on the Add button.
Method 2 – Enlist Intuit Data Protect with Trusted Sites
- Click on the Windows Start menu and once it gets opened, you need to go to the search bar.
- Now you need to write Internet Options and then later select it so that you get directed to a new window.
- Further, click on the Security tab and then you need to go to Trusted Sites.
- In the next step, you must press the sites button and paste the websites into the area given. Press the Sites button and paste the below websites into the given space one after the other. After that, you must press Add –
- *backup.com
- *.intuit.net
- *.intuitdataprotect.com
- *.intuit.com
- *.QuickBooks.com
- workplace.intuit.com
- emerald.backup.com
- Hit Close and then click on OK to terminate the window.
- Now you must visit the Intuit Data Protect certificate site and check if it is allowing you to proceed.
- Finally, try to create the backup file using Intuit Data Protect.
Method 3 – Check if BuEngHost.exe is Running as a System User/window user
- Open the menu on screen by pressing Ctrl + Alt + Del keys together
- In the next step, you need to click on Task Manager to open the Task Manager prompt window.
- Further, go to the tab Details and then try to locate IBuEngHost.exe in the list.
- Make sure that the username is System, and the status must reflect as Running.
If it doesn’t follow the given criteria then apply the following steps
- Reach out to Intuit’s site
- Download the latest installer
- In the next step, it is recommended to save the download to the desktop so that it is easily accessible.
- Now, Right-click on the file and choose to Run as Administrator.
Method 4 – Alter the errors with the QuickBooks Network Data File
- move to the folder where you have stored the QuickBooks file. Usually, it is stored in the C: drive or the network drive.
- Search for the file that shares your company file’s name and has a .ND extension
company_file_name.qbw.nd.
- After you have Renamed, change the extension by typing .old at the end of the file’s name – company_file_name.qbw.nd.old.
- In the end, you need to close the window and open QuickBooks. A newer version will be created automatically, after which you can create the backup for your data file.
Now that you have come across the basic facts about the QuickBooks error 1117, you can resolve the issue manually. In case you feel any technical issue while rectifying the error then you can seek professional help from QBS solutions which is operational 24X7. You can call us on our toll-free number or simply reach out to us through the official website- quickbooks enterprise support